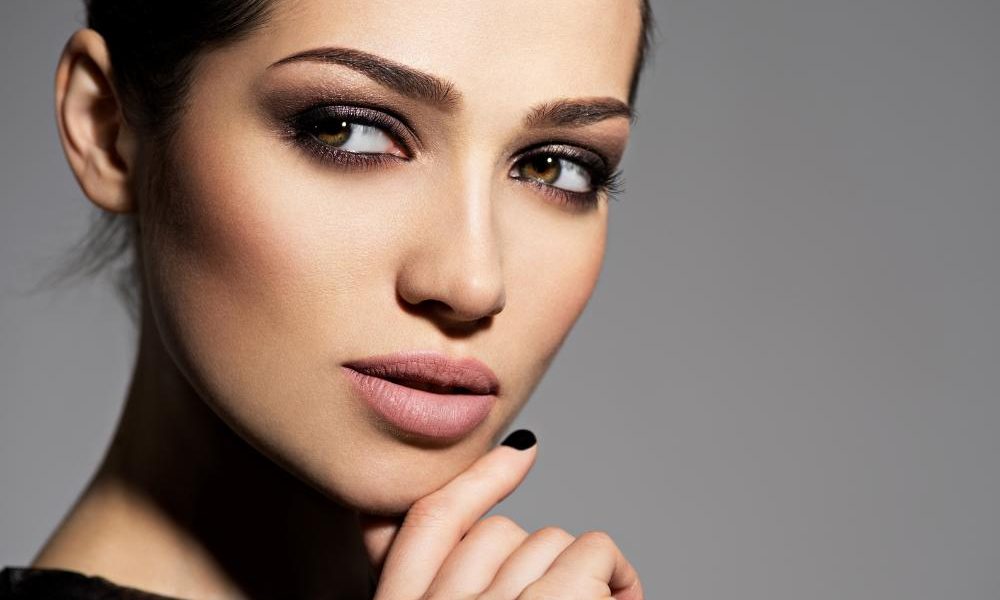
Creating a smoky eye look can seem intimidating, especially for beginners. However, with the right techniques and tools, anyone can master this classic and versatile makeup style. This guide will walk you through the steps to achieve a smoky eye, provide tips from expert makeup artists, and share some personal anecdotes to make the process enjoyable and straightforward.
Why Choose a Smoky Eye?
A smoky eye look is popular for a reason. It’s versatile, flattering, and can be adapted for any occasion. Bobbi Brown, a renowned makeup artist, says, “Don’t be afraid of a smoky eye. It’s one of the most versatile and flattering eye makeup looks. You can go subtle for daytime or amp it up for a night out” (Source: Bobbi Brown – MasterClass).
I remember my first attempt at a smoky eye. It wasn’t perfect, but the more I practiced, the better I got. Now, it’s my go-to look for both casual outings and special events.
Tools and Products You’ll Need
Basic Essentials
- Eyeshadow Primer: Helps the eyeshadow last longer and appear more vibrant.
- Eyeshadow Palette: Choose one with a range of shades from light to dark.
- Eyeliner: Both pencil and liquid eyeliners can work, depending on your preference.
- Mascara: Adds volume and length to your lashes, completing the look.
- Blending Brushes: Essential for achieving that seamless, smoky effect.
- Cotton Swabs/Q-tips: For cleaning up any mistakes or smudges.
Recommended Products
- Cream Eyeshadow Sticks: Lisa Potter-Dixon, a makeup artist, recommends these for beginners: “The key to a beginner-friendly smoky eye is to use cream eyeshadow sticks. They’re easy to blend and you can use your fingers to smudge them out for a soft, diffused look” (Source: Lisa Potter-Dixon Instagram: @lisapotterdixon).
Step-by-Step Guide to a Smoky Eye
Step 1: Prime Your Eyes
Start by applying an eyeshadow primer to your lids. This step is crucial as it ensures that your eyeshadow stays put and doesn’t crease throughout the day.
Step 2: Apply a Base Shadow
Using a neutral base shadow, cover your entire lid up to the brow bone. Sir John, a celebrity makeup artist, advises, “Start with a neutral base shadow all over your lid. Then, use a slightly darker shade to define the crease” (Source: Sir John Instagram: @sirjohn).
For my first smoky eye, I used a light beige shade that matched my skin tone. It provided a smooth canvas for the darker shades to blend into.
Step 3: Build Up the Crease
Take a medium-toned eyeshadow and apply it to your crease using a fluffy blending brush. This will add depth to your eyes. Blend well to avoid any harsh lines.
Step 4: Darken the Outer Corner
Select a darker shade and apply it to the outer corner of your eye in a “V” shape. Blend it inward to create that smoky effect. Charlotte Tilbury, a makeup artist, emphasizes the importance of blending: “The secret to a smoky eye is blending, blending, blending! Start with a light shade all over the lid, then build up the intensity in the crease and outer corner with a darker shade” (Source: Charlotte Tilbury – YouTube Channel).
Blending can be tricky at first. I found that using small circular motions with a soft brush helped me achieve a smooth gradient.
Step 5: Add Shimmer
For an extra pop, apply a shimmer shade to the center of your lid. This creates dimension and catches the light beautifully.
Step 6: Line Your Eyes
Use an eyeliner to line your upper lash line. You can also smudge it out for a more intense look. Katie Jane Hughes, a makeup artist, recommends not forgetting the lower lash line: “Don’t forget to line your lower lash line with a pencil or shadow to complete the smoky eye look. This will help to tie everything together and make your eyes pop” (Source: Katie Jane Hughes Instagram: @katiejanehughes).
I used to struggle with eyeliner, but a pencil liner helped me get more control. Smudging it with a cotton swab created a softer look.
Step 7: Apply Mascara
Finish off your smoky eye look with a generous coat of mascara. This will add volume and length to your lashes, enhancing the overall effect.
Expert Tips for a Flawless Smoky Eye
Blend, Blend, Blend
Charlotte Tilbury’s mantra of blending cannot be overstated. Use a clean blending brush to smooth out any harsh lines and ensure all colors transition seamlessly.
Start Light, Build Up
Bobbi Brown advises starting with lighter shades and building up to darker ones. This approach allows for better control and prevents overdoing the look.
Use Quality Brushes
Invest in good-quality brushes. They make a significant difference in the ease and finish of your makeup application.
I used to use the small applicators that came with my eyeshadow palettes. Upgrading to proper blending brushes was a game-changer. My makeup looked more professional, and the application was much smoother.
Don’t Rush
Take your time with each step. Rushing can lead to mistakes and uneven blending.
The Impact of a Smoky Eye
Perception and Confidence
A study published in Perception suggests that smoky eyes are often associated with attractiveness, confidence, and allure (Source: Perception). Another study in Evolution and Human Behavior found that wearing eye makeup, especially a smoky eye, can make a positive first impression by enhancing facial attractiveness and perceived competence (Source: Evolution and Human Behavior).
Wearing a smoky eye to a job interview gave me a confidence boost. I felt put-together and empowered, which reflected in my performance.
Common Mistakes and How to Avoid Them
Over-Applying Dark Shadow
It’s easy to go overboard with dark shadow. Start with a little and build up gradually.
Not Blending Properly
Harsh lines can ruin a smoky eye look. Always blend well to achieve a seamless finish.
Skipping Primer
Skipping primer can cause your eyeshadow to crease and fade. Always use a primer for a long-lasting look.
Products to Consider
Eyeshadow Palettes
- Urban Decay Naked Smoky Palette: A range of shades perfect for creating smoky eyes.
- Morphe 35O Palette: Great for beginners with a mix of mattes and shimmers.
Eyeliners
- Maybelline Eye Studio Gel Liner: Easy to apply and long-lasting.
- Urban Decay 24/7 Glide-On Eye Pencil: Smooth application and great for smudging.
Mascara
- L’Oréal Voluminous Lash Paradise: Adds volume and length.
- Too Faced Better Than Sex Mascara: Provides dramatic lashes.
Conclusion
Creating a smoky eye look as a beginner can be both fun and rewarding. By following these steps, using the right tools, and practicing regularly, you’ll soon master this versatile and flattering makeup style. Remember, the key is to blend well, build up intensity gradually, and choose the right products for your needs.
So, grab your brushes and eyeshadows, and start experimenting. With these tips and insights, you’ll be rocking a stunning smoky eye in no time.


