Nail art is a fantastic way to express your creativity and style, all while having fun. Whether you’re a seasoned nail artist or just starting, there are plenty of simple yet stunning designs you can try at home. This guide will walk you through easy DIY nail art designs perfect for beginners. We’ll also share expert tips and insights to help you get started and improve your skills.
Why Try DIY Nail Art?
Personal Expression
Nail art allows you to showcase your personality and style. Whether you prefer bold, vibrant colors or subtle, elegant designs, there’s something for everyone.
Cost-Effective
Creating your own nail art at home can save you money compared to regular salon visits. Plus, you can change your designs as often as you like without worrying about the cost.
Fun and Relaxing
Doing your own nail art can be a relaxing and enjoyable activity. It’s a great way to unwind after a long day and indulge in some self-care.
I remember the first time I tried DIY nail art. It was a lazy Sunday afternoon, and I wanted to do something creative. I started with a simple polka dot design using a bobby pin, and I was amazed at how easy and fun it was. Since then, experimenting with different nail art designs has become one of my favorite hobbies.
Getting Started: Essential Tools and Supplies
Before you begin, make sure you have the following tools and supplies:
- Nail Polish: A variety of colors for your base and designs.
- Base Coat and Top Coat: To protect your nails and ensure your designs last longer.
- Nail Art Brushes: Fine-tipped brushes for creating detailed designs.
- Dotting Tools: For making dots and other round shapes.
- Striping Tape: Thin tape for creating straight lines and geometric patterns.
- Toothpicks or Bobby Pins: Useful for creating dots and small details if you don’t have dotting tools.
- Acetone and Cotton Pads: For cleaning up any mistakes and removing old polish.
Expert Quote
Betina Goldstein, Celebrity Manicurist: “Nail art doesn’t have to be complicated. Start with simple designs like dots, stripes, or geometric shapes. You can use a toothpick, bobby pin, or even a piece of tape to create these patterns.” (Source: Betina Goldstein Instagram: @betina_goldstein)
Easy DIY Nail Art Designs for Beginners
1. Polka Dots
Polka dots are a classic and easy design that anyone can do. Here’s how to achieve the look:
- Apply a base coat to protect your nails.
- Paint your nails with your chosen base color.
- Once the base color is dry, use a dotting tool, bobby pin, or toothpick dipped in a contrasting nail polish color to create dots on your nails.
- Finish with a top coat to seal your design and add shine.
2. Stripes
Stripes can be chic and versatile. They can be vertical, horizontal, or diagonal.
- Apply a base coat and let it dry.
- Paint your nails with a base color.
- Once dry, place striping tape on your nails in the desired pattern.
- Paint over the tape with a different color.
- Carefully remove the tape before the polish dries.
- Apply a top coat.
3. Accent Nail
If you’re new to nail art, starting with an accent nail can be a great way to ease into more complex designs.
- Paint all your nails with a base coat.
- Choose one nail on each hand to be the accent nail.
- Paint the accent nail with a different color or add a simple design like dots, stripes, or glitter.
- Finish with a top coat.
4. Gradient Nails
Gradient nails look stunning and are easier to achieve than you might think.
- Apply a base coat.
- Paint your nails with a base color.
- On a makeup sponge, apply two or three colors of nail polish in stripes, slightly overlapping.
- Dab the sponge onto your nails to transfer the gradient.
- Repeat until you achieve the desired opacity.
- Clean up around your nails with a brush dipped in acetone.
- Apply a top coat.
5. Floral Designs
Floral designs can be simple and beautiful.
- Apply a base coat and your chosen base color.
- Use a dotting tool or toothpick to create small dots for flower petals.
- Add a dot of a different color in the center of each flower.
- Finish with a top coat.
6. Geometric Patterns
Geometric patterns are trendy and modern.
- Apply a base coat.
- Paint your nails with a base color.
- Use striping tape to create triangles, squares, or other shapes.
- Paint over the tape with a contrasting color.
- Remove the tape and finish with a top coat.
7. Glitter Tips
Glitter tips add a touch of sparkle without being overwhelming.
- Apply a base coat.
- Paint your nails with a base color.
- Use a makeup sponge to dab glitter polish onto the tips of your nails.
- Finish with a top coat.
8. Negative Space
Negative space designs are minimalist and chic.
- Apply a base coat.
- Use striping tape to section off parts of your nails.
- Paint the exposed areas with your chosen color.
- Remove the tape and finish with a top coat.
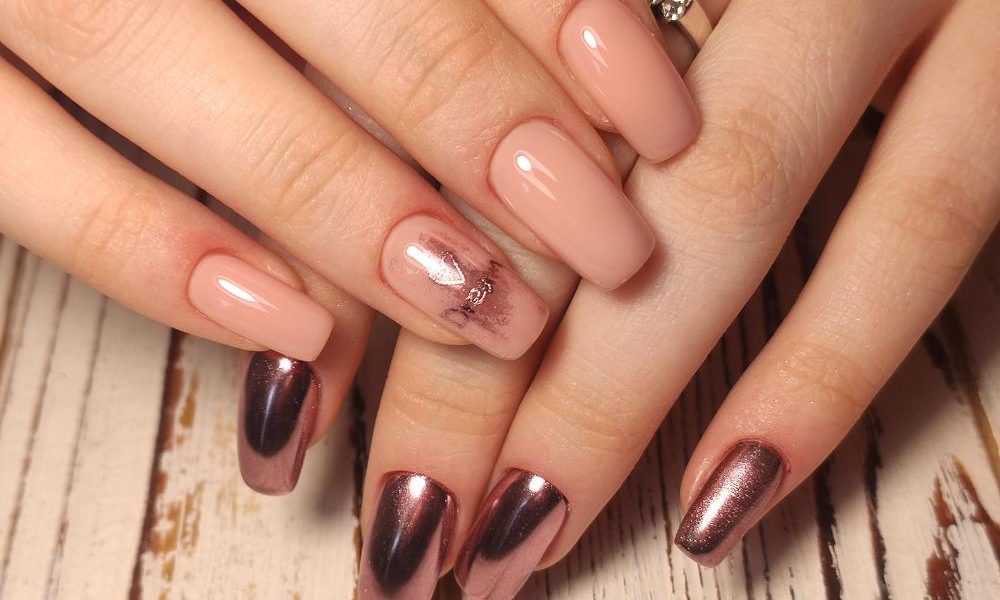
9. French Manicure with a Twist
A modern take on the classic French manicure.
- Apply a base coat.
- Paint your nails with a sheer pink or nude color.
- Use a bright or metallic color for the tips.
- Finish with a top coat.
10. Marble Nails
Marble nails look intricate but are surprisingly simple to create.
- Apply a base coat.
- Paint your nails with a light base color.
- Add drops of a darker color and use a toothpick to swirl the colors together.
- Finish with a top coat.
Mei Kawajiri, Nail Artist: “Don’t be afraid to experiment with different colors and textures. Mix and match polishes, use glitter, or even add small embellishments like rhinestones or pearls.” (Source: Mei Kawajiri Instagram: @nailsbymei)
Tips for Perfecting Your DIY Nail Art
Take Your Time
Nail art requires patience. Take your time with each step to ensure a neat and polished look.
Clean Up Mistakes
Have a small brush and acetone handy to clean up any mistakes around the edges of your nails.
Use a Top Coat
A good top coat is essential for sealing your design and preventing chips.
Practice
The more you practice, the better you’ll get. Don’t be discouraged by mistakes—use them as learning opportunities.
When I first started doing nail art, my designs were far from perfect. I remember trying to create a simple floral design, but the petals ended up looking like blobs. Over time, with practice and patience, I improved my skills and even started receiving compliments on my nails.
Madeline Poole, Nail Artist & Sally Hansen Global Color Ambassador: “The key to DIY nail art is to have fun and not take it too seriously. If you make a mistake, just start over. There are no rules, so get creative!” (Source: Madeline Poole Instagram: @mpnails)
Conclusion
DIY nail art is a wonderful way to express your creativity, save money, and have fun. With the right tools, a bit of practice, and some inspiration, you can create beautiful nail designs at home. Whether you’re a beginner or looking to improve your skills, these easy nail art designs are a great place to start.
Remember to take your time, experiment with different techniques, and most importantly, enjoy the process. Your nails are a canvas for your creativity, so let your imagination run wild.
Nail Art and Self-Expression: A Qualitative Study of Women’s Experiences: This study explores the role of nail art in self-expression and identity formation. It finds that nail art can be a powerful tool for creativity, self-confidence, and social connection. (Source: Journal of Consumer Culture)
The Impact of Nail Art Trends on Consumer Behavior: This study investigates how nail art trends influence consumer purchasing decisions, looking at the role of social media, celebrity endorsements, and personal preferences. (Source: Journal of Fashion Marketing and Management)
By incorporating these tips and designs into your nail routine, you’ll be well on your way to mastering DIY nail art. Happy painting!